Getting started
Introduction
You have Admidio successfully installed and logged in with the user you just created. Now it is time to have a look around the programme. You can do this by calling up the various modules and looking at the pages. This guide is intended to help you take the first steps necessary to use Admidio as a membership management tool in your club, organisation or group. Once you have completed these steps, you will have a basis for integrating and using other modules. If you are missing important points in the instructions, then simply contact us, preferably via the forum.
Set up profile fields
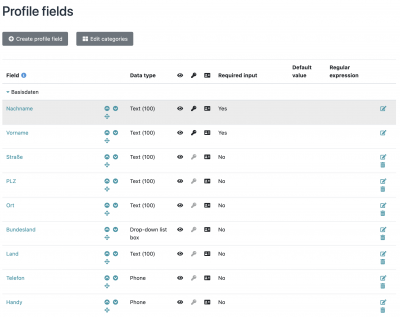
The first step is to think about the data you want to store for each member. Admidio provides a standard set of profile fields. However, you can change and extend them as you wish. To do this, go to the Members module and select the Edit profile fields action there.

At this point you can also consider who is allowed to edit the corresponding profile field. If members are to be able to register via the website, then it is also important to set which fields are displayed during registration and whether these are mandatory fields.
You can always edit and adapt the profile fields later. However, in the first step you should configure the profile fields that you need to import your member data.
Import members
If you have already managed your members in another programme, you can import these members very easily. If there is no member data yet, you can skip this step.
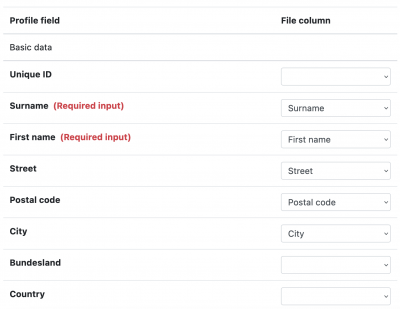
You can find the import in the module Members. Select the action Import members. Admidio supports importing from an Excel file (xlsx and xls), an open document spreadsheet (ods), a CSV file or an html table. During your first import you should assign all members to the role Members. During the import you have the possibility to assign each field from your source file to a profile field in Admidio.

After you have imported all your existing members, they are immediately available in the Members module. You can search for members there and call up and edit their profiles.
Create groups & roles
Now it makes sense to map your group, organisation or club using roles. A description of what roles are and what you can do with them can be found here in the Wiki. You can now create the roles in the module groups & roles and give them the rights you need. If you have already imported members in the previous step, you can now assign them to your roles. There is also a description of role membership in this wiki.

Now you should have created the rough structure of your group, organisation or club and assigned the various rights. If you find out later that you are missing roles or that the rights were not assigned well, you can always adjust them and slowly configure the system so that it works the way you want it to.
Important settings
In the last step, we will go through important settings that you should check or set before using Admidio productively. We will only briefly describe the important settings here. It makes sense to go through all the available settings later on and check whether they are suitable for you. Now go to the Settings module and select the area documented here:
- Regional settings Starting here you need to set your language and maybe country specifics formats e.g. date and time.
- Registration: Here you can decide whether you want to allow new members to register via Admidio. You can also use registration to assign login details to existing members.
- Email delivery: One of the most important areas in the configuration. If you have SMTP access to send emails, it makes sense to use this. Also check with your hoster what restrictions they have on sending e-mails. Admidio offers a wide range of settings to adapt this to the hoster's conditions.
- Messages: In addition to sending e-mails, you should also take a look at the settings for the Messages module. Here you can set or remove further settings which are relevant for a member when creating an e-mail.
- System notifications: You should also take a quick look here. In the beginning it makes sense to be notified of new entries or changes to profile data. This way you can see if everyone is using the system the way you want. You can also adapt the notification texts at this point.
